Get 20% off on LUTs & Presets ! Use Code : Colors

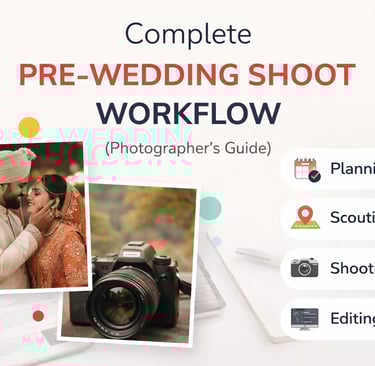
Complete Pre-Wedding Shoot Workflow (Photographer’s Guide)
Blog post description.Pre-wedding shoots have become an essential part of modern weddings in India. Couples today want cinematic photos and videos that tell their story in a unique way. But for photographers, executing a successful pre-wedding shoot requires more than just a good camera. From planning and communication to shooting and editing, every step matters. In this guide, I’ll walk you through a complete pre-wedding workflow that helps you deliver professional results consistently.
3/23/20262 min read

1. Planning the Shoot
A successful shoot always starts with proper planning. Without it, even the best locations and equipment won’t help.
What You Should Plan:
Theme (romantic, cinematic, traditional, fun)
Mood and vibe
Outfits and styling
Shoot timeline
Locations
🔧 Useful Tools:
Pinterest – for mood boards and inspiration
Notion – to plan shoot workflow and ideas
Google Docs – for sharing shoot plan with clients
Pro Tip:
Create a mood board and share it with your couple before the shoot. This ensures everyone is aligned and avoids confusion on the shoot day.
2. Location Scouting
Location plays a huge role in storytelling. The right location can elevate your visuals instantly.
Popular Location Types in India:
Heritage locations (forts, havelis)
Mountains (Kashmir, Himachal)
Lakes and gardens
Urban/city vibes
🔧 Useful Tools:
Google Maps – to explore and shortlist locations
Instagram – search location tags for real references
Sun Seeker App – to track sunlight direction
What to Check:
Lighting conditions
Crowd levels
Permissions required
Accessibility
Pro Tip:
Always visit or research the location beforehand. Knowing your angles saves a lot of time during the shoot.
3. Communication with the Couple
This is one of the most underrated but important parts of the workflow.
If your couple is comfortable, your shoot will automatically look better.
What You Should Do:
Talk to them before the shoot
Understand their story
Ask about preferences
Share references
🔧 Useful Tools:
WhatsApp / Zoom – for quick communication
Google Drive – to share references and inspiration
Pro Tip:
Don’t treat it like a formal shoot. Make it feel like a fun experience. Natural emotions always look better than forced poses.
4. Shooting Process
This is where everything comes together. Your goal is to capture emotions, not just poses.
Key Focus Areas:
Natural expressions
Movement-based shots
Candid moments
Proper framing
🔧 Gear & Tools:
Sony Alpha Cameras – for sharp and cinematic output
85mm Lens – for portraits
DJI Gimbal (RS series) – for smooth video shots
Reflector – for better lighting
Shooting Tips:
Use natural light (especially golden hour)
Avoid over-posing
Guide the couple instead of directing too much
Shoot both wide and close shots
Pro Tip:
Instead of saying “pose like this”, give actions like:
👉 “Walk together”
👉 “Look at each other and smile”
This creates natural results.
5. Editing Workflow
Editing is where your final style comes to life. This step defines your brand.
Editing Process:
Select best photos (culling)
Color correction
Skin retouching
Final color grading
Export
🔧 Best Tools:
Adobe Lightroom – color grading
Photoshop – advanced retouching
Evoto AI – fast AI retouching
DaVinci Resolve – video color grading
CapCut – quick reels editing
👉 You can also simplify your workflow using tools here:
tools4creators.com
Editing Tips:
Keep skin tones natural
Don’t over-edit
Maintain consistency across all photos
6. Delivery & Client Experience
Your job doesn’t end after editing. Delivery is equally important.
What You Should Do:
Deliver on time
Organize files properly
Provide easy access
🔧 Useful Tools:
Google Drive – file sharing
FotoOwl AI – face recognition-based delivery
Pixellu SmartSlides – slideshow creation
Pro Tip:
A smooth delivery experience increases chances of:
referrals
repeat clients
brand value
Conclusion
A great pre-wedding shoot is not just about photography skills. It’s a combination of planning, communication, execution, and editing.
When you follow a structured workflow, you not only improve your results but also create a better experience for your clients. Over time, this consistency helps you build a strong personal brand in the wedding industry.
FAQs
1. How long should a pre-wedding shoot be?
Usually 1–3 days depending on locations and outfits.
2. What is the best time to shoot?
Golden hour (early morning or sunset) gives the best light.
3. Do I need expensive gear to start?
No, skills and understanding of light matter more.
4. How many outfits should a couple have?
3–5 outfits work best for variety.
5. How do I make couples comfortable?
Talk to them, keep it fun, and avoid over-directing.